The RSVP Pro plugin has the ability to record the attendance for an event. This ability exists both in the admin area and also can be made to appear on the public attendee list. Let’s first look at how we can enable this functionality in the admin area.
Enabling the Ability to Check-in Attendees in the Admin Area
To enable this functionality, go to a top-level event’s settings page and click on the “General” tab. Find and check the option called, “Allow Attendee Check-ins.” After ensuring the option is checked, click “Save.”
Once the functionality has been enabled we can check-in attendees from two different spots of the admin area: the attendee list for the event (or the sub-event’s attendee list) and also in an attendee’s edit screen. You will also see the checked-in status on the attendee list, like the screen-shot below: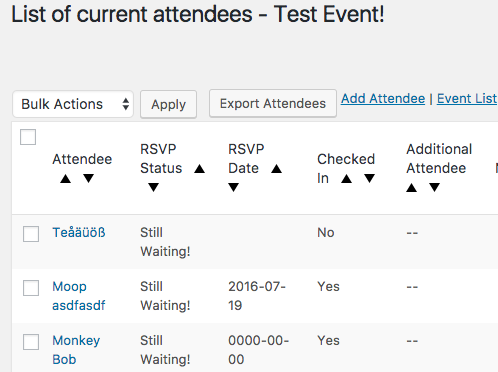
You can either check-in a group of people at once, or check them in individually. To check-in a group of attendees, go to your event attendee list and place a check next to the individuals you wish to check-in. Then click on the bulk actions drop down menu and select, “Check-In.” The bulk action check-in option will only be available if ability to check-in has been enabled as discussed at the beginning of this article.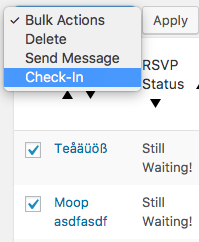
Once you select that action just click “Apply” and the attendees will now be checked in.
Alternatively, you could click on an individual attendee to go to their edit screen and toggle the checkbox, as below: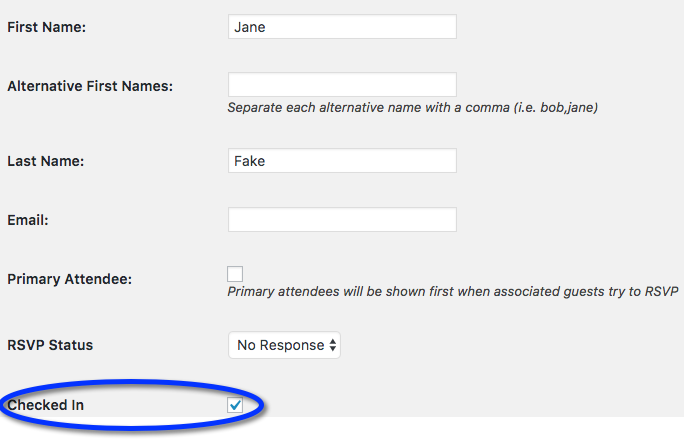
Besides the check-in status showing up in the attendee list it will also be in a column in the exported data.
Enabling Public Attendee List Check-Ins
For some events, you may want attendees to check themselves in, or you may want another designated individual to take attendance without giving them admin access to your site. Using the public attendee list short code, you can enable check-ins from the front-end. To add this functionality, go to a top-level event’s settings page and go to the “Public Attendee List” tab. The screen shot below shows the options that are available: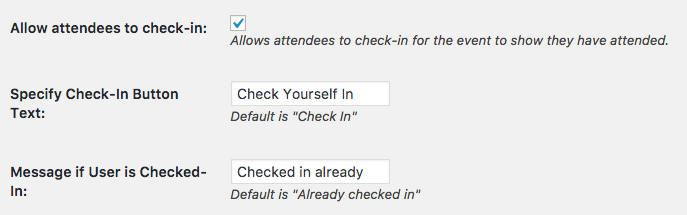
The primary option is “Allow attendees to check-in.” If this is checked, the ability to check-in will be on the public attendee list. When this option is checked and the general “Allow Attendee Check-Ins” option is not checked we will turn on the admin specific option as well. This allows for all functionality to exist in this case. The other two options change the text of the button the user will see when they check-in from the attendee list.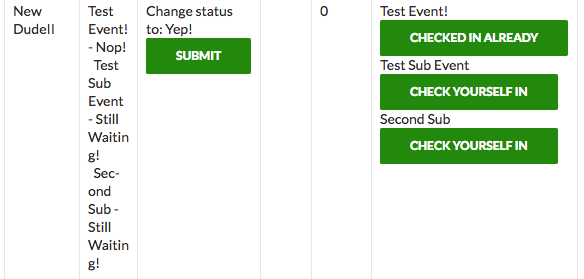
For each event and sub-event, the attendee has the ability to check him or herself in to the event.
If you believe anything is missing or run into any problems using this functionality, please feel free to contact us!